10 Tips To Build Your Coffee Pot Drip Empire


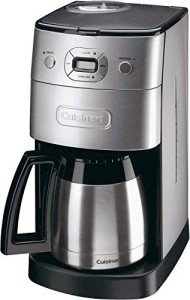
Fixing a Drip Coffee Maker
It's time for you to fix your leak if you notice water flowing out of the safety valve on your drip coffee maker. click here. that you'll be able to repair it.
We will also look at how to maintain the coffee maker and discover various ways to make fantastic coffee using a drip coffee machine.
1. Carafe Leaks
Drip coffee is made by pouring hot water on ground coffee beans and allowing the coffee to seep through before being poured into a vessel like a pot or carafe. It can be made in different ways with various terms being used for the coffee that is brewed based on the method used and the equipment being employed. Some common methods are called pour-over, French drip, and automatic drip.
Using a drip coffee maker is a great way to get your morning fix without having to wait for a cup of joe at a café or to wait for it brew at the office. However the convenience of these machines could be a problem if something goes wrong with them. One of the most common issues is that the coffee maker will drip when you pour. This can be quite annoying and cause your coffee to be messy, but it can also lead to scalding your hands or other surfaces.
It is the position of the coffee pot that could cause it to leak when you pour. The spout of a carafe is typically located in the back, near the reservoir of water. This is because there isn't enough room in the front of the container to accommodate an spout that is deep and easy to pour from.
When it comes to liquids they flow when there is less pressure. This is why some older drip coffee makers spill when you try to pour.
This problem can be solved quickly. You can fix this problem by moving the spout towards the front of the carafe. This will solve your dribbling issue and save you the trouble of cleaning your counters every morning.
The amount of coffee that you pour in the carafe may also be the cause of the drips. Two tablespoons of coffee for six ounces of water is the recommended ratio. The ratio might have to be adjusted if the density of the ground changes. A kitchen scale is a handy tool for this, as it will allow you to keep on top of your coffee and water ratios and avoid over- or under-extraction.
2. Spout Leaks
If you've ever considered different drip coffee makers that are budget-friendly, you'll notice that they come in a wide range of shapes and sizes. Some have thermal carafes, others don't, and some dispense water with tight spout rings and others make use of wide ones.
The small valve at the end of the hose could alter the way the machines disperse water. The valve could become blocked with gunk and, when it happens, spout leaks can be the result. It's easy to repair. Unplug the pot and pour the water into the sink. Remove the valve and clean it.
3. Safety Valve Leaks
Bialetti pots are supposed to function flawlessly, whether you're sleeping or heading to the kitchen to flip the magic switch. If that happy sounding gurgling or promising rumbling does not occur, it's the time to find out what the problem is.
There's a hole at the bottom of the bucket and an extension tube that connects to it. During the boiling process, this tube is used to carry the water up to the drip area. The tube is equipped with a single flow valve that allows cold water to flow back to the bucket, but forces the bubbles from boiling water to rise in the coffee pot.
If you notice that your coffee maker is releasing steam or pressure through the safety valve on a regular basis, it's possible that the valve has become blocked and requires to be serviced or replaced. Place a bucket underneath the safety valve pipe, and push the lever up a few times. (Use gloves since the water is hot). This may resolve the issue, but if it doesn't, it's time to call in a professional. This is a long-lasting task since the valve has to be removed and dismantled.
4. Filter Leaks
The reservoir and filter form the central components of every drip coffee maker. They are the place where water begins and is finished its journey to make your morning cup of coffee. It is crucial to follow the correct water usage guidelines, as well as cleaning and maintenance procedures throughout the brewing process. This will ensure that your coffee maker is operating at its best.
When you turn on the coffee maker, water in the reservoir will be heated by an element of heating resistance. The heat will rise up through a tube of white that lies below the reservoir's base. This hot water then flows over the coffee grounds and begins to absorb flavors from the grounds. As the hot water flows over the coffee it absorbs coffee oils that are released during roasting. These oils give coffee its characteristic flavor and aroma.
Wet coffee grounds that sit too long can result in the growth of mold. To avoid this, store the grounds in a manner that will allow them to dry more quickly (e.g. hanging, separate from the coffee maker or propped up to allow air flow or air flow, etc. ).
If the coffee grounds aren't the proper size for your drip coffee maker, they can hinder the flow of water or cause overflows. Therefore, it is recommended that you use a single paper or reusable filter of the proper size for your drip coffee maker. It is also a good idea to experiment with the brew duration to find out which setting provides the most flavor.
Regular cleaning and decaling are also necessary for optimal performance. To remove the buildup of minerals adhere to the manufacturer's instructions on how to clean and decal your machine. Also, try to use water that has been filtered or bottled instead of tap water as it will make for better tasting coffee.